Happy New Year!
Around this time of year, many of us like to do a big Spring Clean – including sorting through your wardrobe. You’ll fill a bag of clothes, clearing out any items that have gone a little too worn out or a little too boring & are abandoned in your wardrobe for months on end. All you want to do is head for the January sales! It’s the normal attitude in our Fast Fashion culture. Unfortunately the sad fact is that in Ireland alone, over 225,000 tonnes of textile waste goes straight to landfill every year. And as seen in The True Cost movie, the USA throws out 11 MILLION Tons of textile waste every year. Every year!
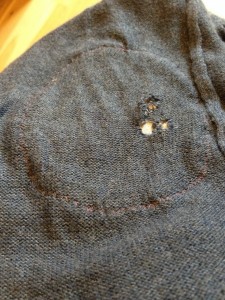
There are many ways you can add life to your existing wardrobe, to help reduce your shopping list for January & also reduce the pile going to the rubbish bin. Adding elbow patches is a great way to hold onto some of those pieces of clothing just a little longer. With some basic sewing skills you can personalise & modify the clothes that you’ve grown bored of, or update items that need a little fixing. I have a lovely Mantaray cardigan which has a pretty sizeable rip in the sleeve – I’ve been wearing it & trying to hide it for about a month at this stage! So last week I finally ticked this little task off my list.
- Tutorial #02 – Adding elbow patches!
What you need:
Your piece of clothing, Rectangle of fabric for the patches (approx. 10″ x 5″), scissors, thread, needle (or sewing machine), iron. If you haven’t sewed by hand before check out this handy Instructables turorial for basic tips
Step 1 – Put on the jumper/cardigan/blazer & mark the elbow point with a pen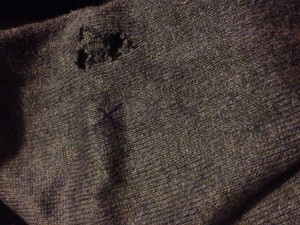
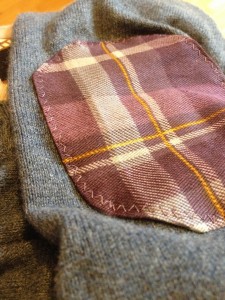
Step 2 – Cut out a template shape for your elbow patches out of paper. Then cut 2 x elbow patches from your fabric. The colour, size & shape, can be as plain or as crazy as you like! 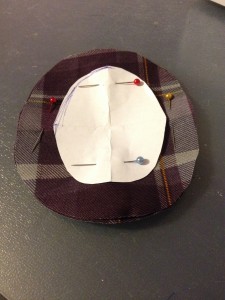
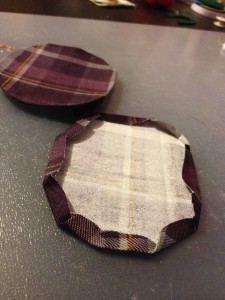
Step 3 – Iron in the edges of the patches so that the edges won’t be exposed. Ironing it in advance makes it much easier to sew it correctly.
Step 4 – Pin the patches in position on the cardigan sleeves.
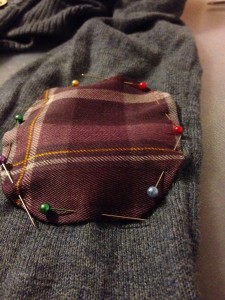
Step 5 – Sew in place. Make sure to double knot at both ends to keep it secure.
 (View from back)
Step 6 – Pop on your newly upgraded piece of clothing & show off to all your friends! Yves St Laurent ain’t got nothing on me…
If you want to know more about where your clothes come from, check out this great little website, Project Just (best viewed on a computer)
And from Jigsaw’s latest ad campaign – Remember, your clothes are for life, not landfill!!
Happy 2016 Project Planning! x
Follow us on Facebook to make sure you don’t miss the next post!